Showing posts with label dessert. Show all posts

Tuesday, 26 January 2016

Dreamy Chocolate Mousse Cake - Baking For Sport Relief 2016

As any avid Bake-Off fans will be aware, this week sees the return of The Great Sport Relief Bake Off, in which a handful of celebrity bakers will be taking to the tent in aid of Sport Relief 2016. This year, the 'Queen of Print' Orla Kiely has designed the limited edition aprons which the winning Star Bakers will be presented with, and as budding bakers ourselves, we have managed to get our hands on some! With our new look complete, it's time to get down to some baking - so here is our latest obsession - Dreamy Chocolate Mousse Cake. As it is in aid of Sport Relief, we have gone for something a tiny bit healthier than your average chocolate cake. With no flour, a whopping eight eggs and mainly natural sweetener, it's no wonder this cake has such a light, moussey and dreamy texture. It is ideal as a light dessert, alongside a dollop of smooth crème fraîche.

If you want to get baking for Sport Relief yourself, get your own lovely limited edition Orla Kiely Apron from TK Maxx, Homesense, or www.sportrelief.com. They retail at £12.99, with at least £5.25 going to Sport Relief, who use public donations to help people living incredibly difficult lives both in the UK and across the world.

Keep reading for our recipe and get baking yourself!


You will need...

200g 70% minimum dark chocolate
200g butter
Pinch of sea salt
8 eggs
100g maple syrup
50g caster sugar
Cacao/cocoa powder for dusting
Crème fraîche, to serve

You will need to...

- Grease and line a 24cm loose bottomed cake tin and preheat the oven to 160C.

- Break up the chocolate and cube the butter. Place both in a large bowl with a generous pinch of sea salt, and melt gently over a pan of simmering water. Set aside to cool slightly.

- Meanwhile, separate the eggs and whisk the whites in a large clean bowl until thick and fluffy and will hold a peak. 

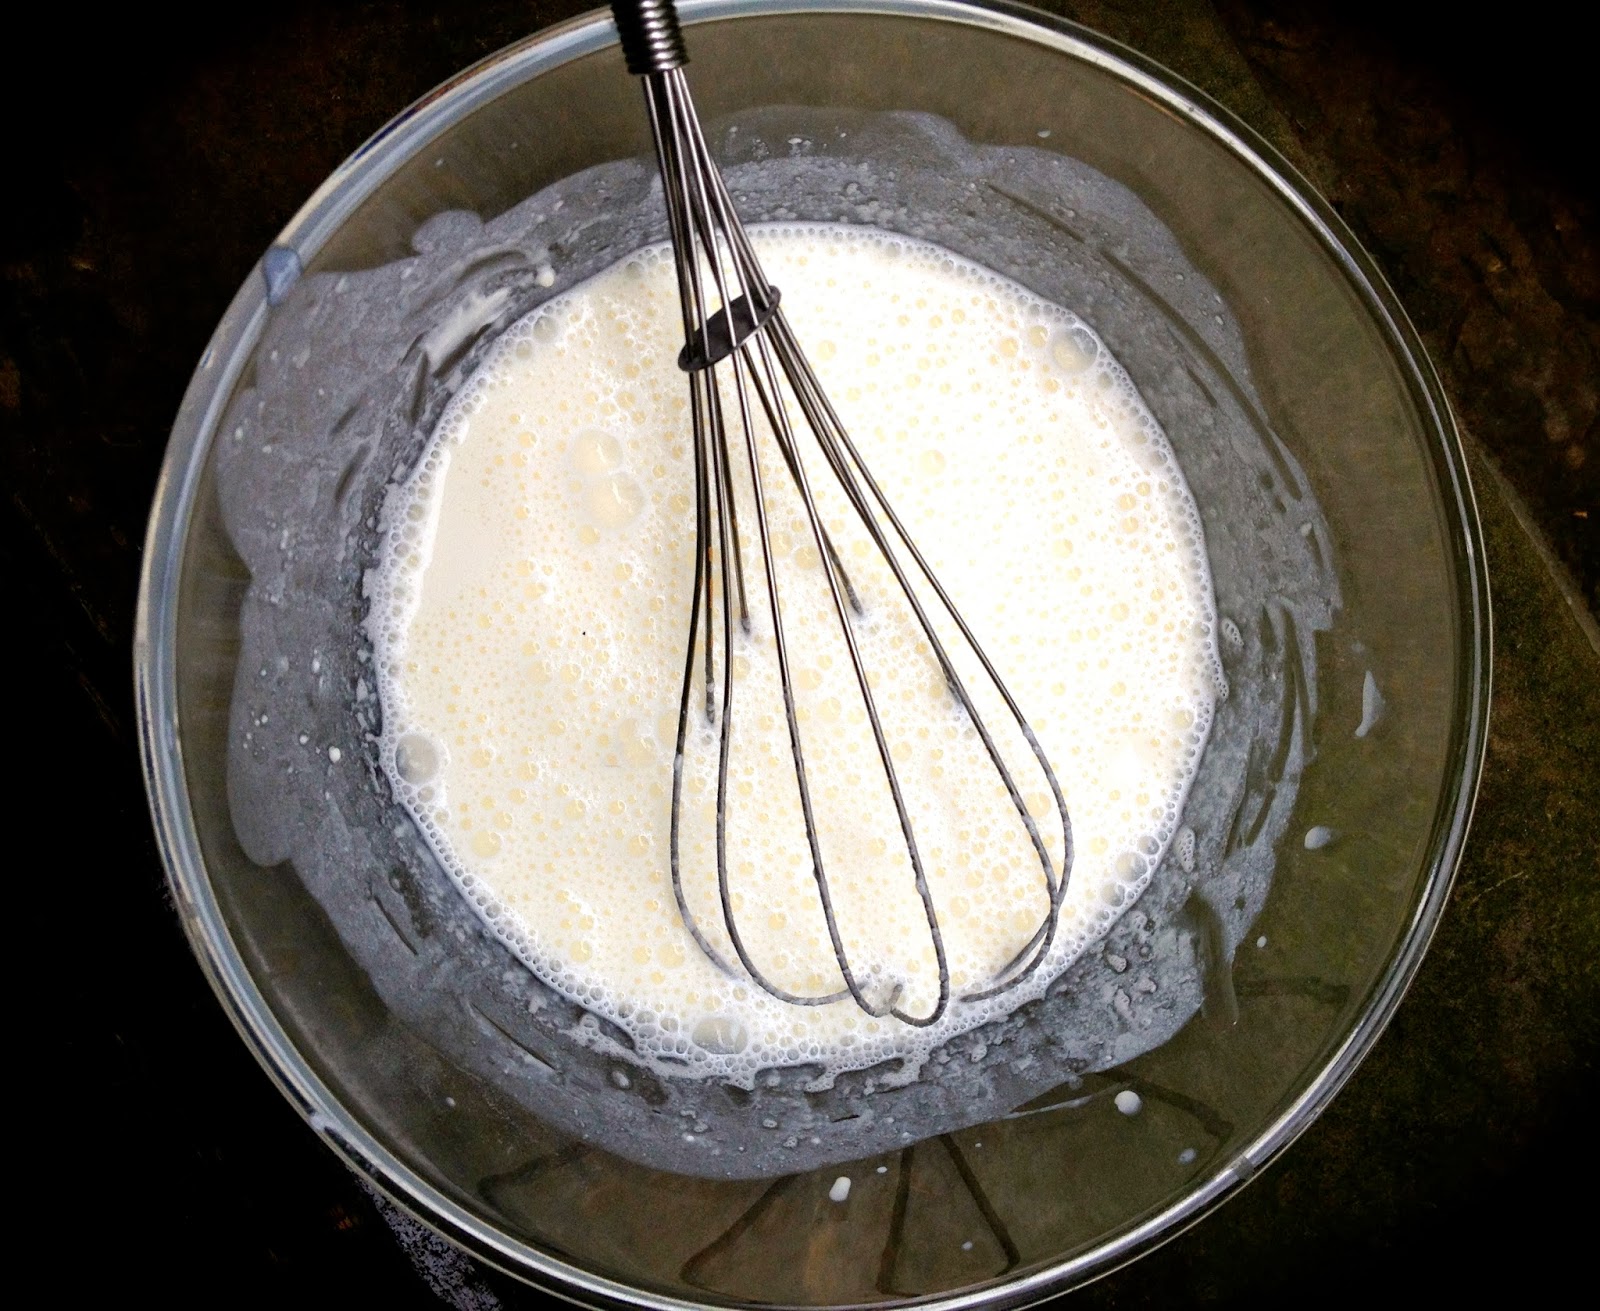
- In a smaller bowl, whisk together the egg yolks with the sugar and maple syrup until they are pale, thickened and fluffy (ribbon stage).

- Gently fold the yolky mixture through the chocolate, then fold through the egg whites as gently as you can!

-Pour the mixture into your tin, and set it inside a deep baking tray. Place this on the over shelf and pour an inch of boiling water into the tray around the cake.

- Bake for 20 - 30 minutes, checking after 20. The cake should be just set with a slight wobble in the middle.

- Leave to cool on a wire rack before removing the tin. Dust with cacao powder before serving alongside a dollop of good crème fraîche.


Bake yourself proud!

C & Z x

Wednesday, 7 October 2015

Great British Bake Off - Pecan Pie with Spiced Rum

As any avid baker will agree, Wednesday nights mean only one thing - The Great British Bake Off.  Now as I'm sure you are aware, tonight is the grand final of the 2015 series, and it therefore seems appropriate to have a GBBO themed blogpost to mark the occasion. If you cast your mind back to last series, you may remember finalist Richard Burr - the laidback builder-turned-baker who cooked up a storm with his trademark pencil behind his ear. Richard has gone on to prove that there is life beyond the tent, having published his debut cookbook BIY- Bake It Yourself (see what he did there?) last month. It is a cracking book, with a good mix of fairly simple but delicious recipes, as well as a few trickier showstopper bakes for the more ambitious baker - Hazelnut Chocolate Opera Cake anyone? If you follow us on Instagram, you will have seen a couple of the recipes I have tried out already, however it was this Pecan Pie with Spiced Rum which really caught my eye. Quick, simple and totally moreish - this proved a huge hit with the family, and is the ideal pudding to round off these colder autumnal evenings. It also keeps well, and seems to improve with age, which is always a bonus if it hasn't been demolished in one go!


Read on for my take on Richard's recipe…


To make the pastry you will need…

- 200g plain flour (plus a little more to dust)
- 100g cubed butter
- A pinch of salt
- 2 tbsp caster sugar
- A couple of tbsp cold water

To make the filling you will need… 

- 100g golden syrup
- 100g maple syrup
- 100g caster sugar
- 50g soft light brown sugar
- 75g butter
- 3 large eggs
- 1/2 tsp vanilla bean paste
- 2 tbsp spiced rum
- 100g chopped pecans
- 100g ground almonds
- 100g pecan halves


You will need to…

-  Make the shortcrust pastry - either by combining the ingredients together in a food processor with a little water to bind, or if by-hand, rub the butter into the flour until the mixture resembles breadcrumbs. Stir in the salt and sugar, then use a palette knife to stir in enough cold water to bind the mixture. Knead your ball of pastry gently for a minute or so to combine, then wrap in clingfilm and set in the fridge to cool and firm up for half an hour. 

- Preheat the oven to 200C and find yourself a 23cm loose-bottomed tart tin.

- Remove the pastry from the fridge and roll it out on a floured work surface. It should be large and circular enough to fit the tin, and only couple of centimetres in thickness. Roll this up onto the rolling pin and then lay it out into your tin. Press the pastry into the edges of the tin, but leave a little excess overhang as the pastry will shrink in the oven. 

- Line your pastry with a disc of baking parchment and fill with baking beans - blind bake in the oven for 15 minutes.

- Take the tin out and remove the parchment and baking beans. Bake the pastry case for a further 8 or so minutes until golden brown. Take out of the oven and leave to cool. Trim off any excess pastry.

- To make the filling, melt the golden syrup, maple syrup, butter and sugars in a saucepan over a low heat. Allow to cool so as not to cook the eggs.

- Beat together the eggs, vanilla paste and rum, and stir into the cooled sugar mixture along with the chopped pecans and ground almonds. 

- Pour the pecan mixture into the tart case and carefully arrange the pecan halves on the surface in concentric circles - this can be a bit fiddly as the mixture underneath moves around a bit!

- Bake for 35-45 minutes until the pie has risen a little in the middle and is golden brown and set. If the nuts are browning too quickly cover with a little tin foil. 

- Set on a wire rack and remove from tin once completely cool.

- I think this is best served at room temperature with a generous pouring of cream or crème fraîche.


Enjoy! C x

Tuesday, 16 September 2014

Blackberry and Raspberry Galette

With an abundance of blackberries growing in the hedgerows at this time of year, this rustic autumnal pud is a quick, easy and delicious way of using them up - get picking and you'll have yourself an (almost) free pudding! A galette is somewhere between a pie and a tart, though I'd argue better than either as it is freeform so doesn't require a tin or dish, and folding over the edges ensures maximum delicious crusty pastry. This one has a few raspberries thrown in as well but it works just as well with only blackberries, or some finely chopped apples instead.


To make a galette to serve four you will need…

100g plain flour
50g butter
1 dessert spoon icing sugar
A pinch of salt
3 tbsp cold water

300g fruit (blackberries, raspberries, chopped apple or a combo)
1 dessert spoon caster sugar 
1 dessert spoon cornflour
1 tsp vanilla extract
1 egg for egg wash
A little extra caster sugar to sprinkle on top


You will need to...

- Make shortcrust pastry by combining ingredients in a food processor (if lazy) or by hand by rubbing cubed butter into the mixture of flour, icing sugar and salt until fine breadcrumbs form. Add enough cold water and combine until the pastry just comes together, then wrap in cling film and chill in the fridge for minimum 1 hour. 
- Preheat oven to 180C. Line a baking tray with greased baking parchment. 
- Place fruit in a bowl then gently stir in the cornflour, caster sugar and vanilla until combined - try not to squish the berries too much.
- Roll out your chilled pastry on a lightly floured surface to form a rough circle. Transfer onto the prepared baking tray.
- Spoon fruit into the middle of the pastry, then fold up the edges as pictured.
- Lightly beat the egg in a small bowl, then brush over the pastry and top with a sprinkle of caster sugar.
- Bake for about half an hour or until pastry is golden and crisp.
- Serve warm with a generous helping of single cream.


 Enjoy! C x


Tuesday, 9 September 2014

A Flavour of France II

If you follow us on Instagram you will know that I spent a few weeks holidaying in France this summer with my family. Aside from sunbathing, swimming and a little canoeing, the holiday involved a lot of eating (naturally). If you are a long-term reader of Not Just A Pretty Plate you may remember a similar post last year in which I threw a handful of French-inspired recipes into one post. Once again, please excuse the slightly haphazard and vague ingredients/quantities/timings used in these recipes. In true holiday spirit, all the cooking was fairly relaxed and thrown together so don't worry too much about being precise! I've included canapés, a starter, two main course dishes and also a pudding, but if that doesn't satisfy your appetite for french cuisine be sure to check out last year's Flavour of France for some similar recipes. Bon appétit! 

Goat's Cheese and Grape Bruschetta

Despite bruschetta being Italian, these nibbles are inspired by South Western France, a region know for it's goat's cheese. This is a slightly different take on the tried and tested combination of sharp cheese and sweet fruit. They literally take minutes to prepare - simply slice a small and slightly stale baguette into thin slices and place on a baking tray. Warm in the oven for about eight minutes until slightly toasted, then top with a slice of goat's cheese and half a grape. Serve slightly warm to ensure the cheese is melting a little in the middle. 

Melon and Jambon Sec Salad


 This is a bit of a seventies throwback, but the fact that it has stood the test of time is testament to the fact that it is simple, good, tasty food. With only four ingredients, this is a classic example of how good food need not be fussy or overcomplicated, and if you have good produce it can speak for itself. To prepare all you need to do is artfully combine chunks of Cantaloupe melon and wafer thin sheets of jambon sec or parma ham on a plate, then top with a drizzle of walnut oil and sprinkling of ground pepper.

Baked Salmon with Roasted Veg


This is SO easy and basic it really doesn't warrant a recipe. As well as being an ideal dish to throw together on holiday when you'd rather be spending time on a sun lounger than in the kitchen, this is also makes a great weekday supper. All you need to do is: lay a few fillets or whole side of salmon on a large sheet of baking parchment on a baking tray. Top with a few slices of lemon, a couple of handfuls of chopped parsley and some salt and pepper. Wrap the parchment over to create an envelope for the salmon - as well as gently steaming the fish in its own juices, it also removes the skin underneath as it sticks to the paper as it cooks. Bake for about 20-30 minutes until just cooked through. For the roasted veg chop up a selection of vegetables such as onions, courgettes, peppers and garlic. Dress with olive oil and toss through some dried oregano and fresh rosemary and thyme as well as plenty of salt and pepper. Roast in a hot oven for about forty minutes or until all the veg is cooked through and starting to crisp at the edges.

Duck Confit with Puy Lentils 
Now I have to confess that these delicious duck legs weren't confit-ed by myself from scratch - the ingenious French supermarkets sell them ready-confit-ed and vacuum packed in duck fat so all you have to do is whack them under the grill for ten minutes to heat them through and crisp up the skin nicely. I'm not sure you can buy them like this in the UK although I shall be keeping my eyes peeled. Having confit-ed from scratch before, I can assure you it isn't particularly difficult but involves buying a LOT of duck fat to cover your duck legs in! We served ours on Puy lentils with a touch of crème fraîche - a regional classic. To make the lentils you will need: 

2 onions, 
1 celery stick
2 small carrots
1 small potato
2 garlic cloves
500g Puy lentils - rinsed well in cold water
1 bouquet garni - tie together a few sprigs of rosemary, thyme and a bay leaf
1 stock cube
Boiling water
Red wine vinegar
1 small bag of spinach
1 tbsp crème fraîche plus more to serve

-Finely dice your celery, onions, potato and garlic and sauté in a large pan until softened. 
-Stir in the lentils, bouquet garni and stock cube. Add boiling water to cover.
-Simmer gently for about 40 minutes or until soft - keep an eye on it and add more water if necessary.
-Stir in the bag of spinach and allow to wilt.
-Take off the heat and stir in a good slug of red wine vinegar, a tablespoon of crème fraîche and some generous seasoning. Adjust to taste. 
-To serve spoon the lentils onto a plate, add a teaspoon of crème fraîche and top with your confit duck.  

Maple Roasted Nectarines


These are inspired by The Londoner's Honey Roast Peaches although I've substituted peaches for nectaries and honey for maple syrup. If you haven't checked out Rosie's blog before then go and have a look - her simple yet delicious recipes are great and the photography is always on-point. To make this pudding you need to half and de-stone your nectarines and place them in a baking tray. Pop a small knob of butter in each half and drizzle the whole lot generously with maple syrup. Scatter over a handful of flaked almonds and bake for about 20 minutes. Serve with a scoop of vanilla ice cream or crème fraîche and a couple of spoonfuls of the syrupy buttery nectarine juice. 

Enjoy! C x

Monday, 21 April 2014

Hazelnut Meringue Sandwich

Another spring/summer pudding for you - this time in the form of a Hazelnut Meringue Sandwich Cake. This is like a slightly more interesting and sophisticated Eton Mess, but thankfully just as simple to put together. The recipe is a slightly adapted version of the one in Rosie Lovell's book, Supper With Rosie, and is brilliantly easy and fresh with relatively few ingredients. Despite this it is still impressive to serve, and is a crowd-pleasing way to round off a spring supper - who doesn't like meringues and cream? I would also be interested to substitute the hazelnuts for pistachios and see how that worked, although uni work is preventing me from much kitchen experimentation at the moment so I haven't got round to that just yet…


You will need…

4 egg whites
125g hazelnuts
250g caster sugar
1 tsp vanilla extract

275ml double cream
1 punnet of raspberries 
1 tsp vanilla paste or 1 vanilla pod

You will need to…

- Preheat oven to 200C.

- Line the base of two 20cm cake tins with foil. Grease the sides of the tins and the foil well with vegetable oil.

- Toast the nuts in a dry pan over a low heat for a few minutes until darkened and fragrant, then blitz them in a food processor or coffee grinder until chunky.

- In a large bowl, whisk the egg whites until firm then gradually whisk in the sugar.

- Gently fold in the vanilla extract and ground nuts until well combined, then divide the mixture between the two prepared tins.

- Bake for 12 minutes in the oven, then turn the temperature down to 170C and cook for a further 30 minutes. Leave to cool completely in the tins.

- When ready to serve, whip the cream to soft peaks with the vanilla paste or the seeds of one scraped vanilla pod. 

- Fold in the raspberries, then spread the mixture over one of the meringues and place the second on top.


Enjoy! C x


Monday, 3 March 2014

Fruity Pancakes with Salted Caramel Sauce

Here is our last minute Pancake Day offering! Whilst a big fan of the traditional crêpe (preferably smothered with as much Nutella as humanly possible, or more elegantly topped with sugar and fresh lemon juice) this year I fancied a bit of a change. These American-style pancakes or 'drop scones' are topped with the most delicious salted caramel sauce, complemented perfectly by a scattering of fresh fruit that make you feel at least a tad virtuous. This impressive stack would make the ideal indulgent breakfast or brunch, and as our recipe uses only mugs and spoons as measurements, it is very well suited to an ill equipped student house such as ours. These would also be delicious topped with fruit and natural yoghurt or crispy bacon and maple syrup. Get flipping. 


To make a hefty stack you will need...

1 mug self-raising flour
1 mug milk
1 egg
1 capful vanilla essence
A pinch of salt

And for the Salted Caramel Sauce...

2 tsp butter
2 tbsp soft brown sugar
3 tbsp double cream
A large pinch of salt

1 banana, and a handful each of strawberries and blueberries


You will need to...

- In a large bowl, whisk together the flour, milk, egg and vanilla.

- Put a good, non-stick frying pan on a moderate heat and add a small knob of butter. Use a folded piece of kitchen paper to absorb the melted butter and ensure it is smeared all over the base of the pan. Keep this, and wipe it over the pan when you feel it is getting a little dry as you make the pancakes.

- Ladle the pancake mixture into the pan - leave for about 3 minutes or until you can see bubbles all over the surface of the pancake, then flip as flamboyantly and theatrically as you dare, and cook for a final 2 minutes or until golden brown.

- Continue until all of your mixture is used up - as you make them put them on a plate or board and cover with a clean tea-towel to keep them warm.

- To make the salted caramel sauce, melt the butter and sugar in a small saucepan then stir in the cream and enough seasalt to taste. Do not boil the mixture or it will become too thick to drizzle over your pancakes.

- To serve, stack up your pancakes and pour over the sauce, finally topping with the fruit.

Happy Pancake Day! C x

Thursday, 13 February 2014

Valentine's Day Delight: White Chocolate Mousse


This is not strictly a Valentine's Day recipe, infact I usually make it in the summer when the strawberries are at their juiciest. However, it doubles up as a romantic pud so why not see if you can impress the other-half or alternatively indulge your single friends! I am aware that the average student house does not contain a set of mousse rings, so I have developed my own tactics for this recipe, which involves cutting up cream or yoghurt pots to make DIY mousse rings. This is a Mary Berry classic adapted to be more student-friendly, and of course if required it has a romantic decorative twist for Valentine's Day...


For six mousses you will need...

50g dark chocolate
75g hobnob biscuits
200g white chocolate
200ml double cream
200ml crème fraiche
225g strawberries

6 mousse rings if you have them, or if not,  DIY using yogurt pots (see below)


You will need to...

- Melt the dark chocolate in a bain-marie.

- Meanwhile, bash the hobnobs with a rolling pin in either a freezer bag or large mixing bowl. When they are finely crushed, stir in the melted dark chocolate. 

- Lay the mousse rings on a baking tray lined with baking parchment. 

- Press the biscuit base into the mousse rings using the back of a metal spoon. Make sure that they are all even and not too thick.

- Chill in the fridge to set whilst you make the filling.

- Melt the white chocolate in a bain-marie, then stir in the crème fraiche and double cream.

- Chop the strawberries into even, thin slices, then remove the bases from the fridge and line the mousse rings with your sliced strawberries.


- Spoon the white chocolate mixture into the middle of each ring - make sure they are only filled to about 2/3 full otherwise it will not hold when the ring is removed.

- Put the mousses back into the fridge and leave to set for about 4 hours.

- When ready to serve, carefully remove the mousse rings and serve with a romantic heart-shaped strawberry slice for Valentine's Day, or on other occasions, a sprig of mint or spoonful of fruit coulis will suffice!


Enjoy! Z x 

Tuesday, 17 December 2013

Spiced Chestnut Ice Cream

Apologies for a consecutive ice-cream recipe, but consider this the 'Christmas edition'. I am not the greatest chestnut fan, but in this festive ice cream the subtle chestnutty taste is delicious - paired with a touch of cinnamon and booze it really is Christmas in a mouthful. The recipe is outrageously quick and easy, so you may find the most difficult part is actually sourcing the chestnut puree. I brought mine back from France this summer, and although less common, it can also be found in some UK supermarkets. This is a fantastically simple dessert on its own, or makes a decadent accompaniment to mince pies, Christmas pud, or whatever else you fancy at this time of year.


For roughly 1.5 litres of ice cream you will need...

450g sweetened chestnut puree (from jar or can)
4 tbsp dark rum
1 tsp ground cinnamon
600ml double cream
100g icing sugar


You will need to...

- Mix together the chestnut puree and rum. 


- In a large bowl whip the cream to soft peaks, then sprinkle over the icing sugar and cinnamon. Stir well to combine.


- Pour the chestnut and rum mixture onto the cream and mix until all is smooth and combined.

- Spoon into ice cream tubs or tupperwares and cover with an airtight lid. Freeze for a minimum of 6 hours or ideally overnight, and serve on its own, or alongside a festive treat of your choice.


Enjoy! C x 

Wednesday, 13 November 2013

Accidental Ice Cream with Berry Compote

As the title suggests, this recipe evolved completely by accident. I was attempting to make cake icing out of some left-over mascarpone, but after adding too much milk the mixture was far too runny to do anything with...or so I thought. After putting it in the freezer in an attempt to thicken the mixture, I totally forgot about it and found it a few of hours later when it was completely solid, however after trying it, my housemate and I realised that this series of disasters had actually resulted in some delicious and ridiculously easy-to-make ice cream. It seems every cloud does has a silver lining! The only problem with an accidental recipe is that I obviously wasn't measuring anything as I went along, so I have had to so some guesswork - you get the general idea though. 


You Will Need...

250g mascarpone cheese
Roughly 200ml whole milk
1 tsp vanilla extract
3-5 tbsp icing sugar

A small punnet each of raspberries & blueberries


You Will Need To...

- Put the raspberries and blueberries in a saucepan with a dash of water and leave to simmer for 10-15 minutes, until they have burst and resemble a jammy compote. To make this ultra smooth pass through a sieve. Leave to cool.


- Whisk the mascarpone until smooth. Gradually add the milk to thin the mixture, and whisk until the lumps have disappeared. 


- Stir in the vanilla and sugar to taste. Put in the freezer for half an hour or so, until semi-set.


- Once the ice cream is partially set, fold through half of the compote to achieve a rippled effect - be very gentle to avoid the whole thing turning into an ugly pink mess.


- Place the ice-cream back in the freezer for a couple of hours or until completely frozen.

- Serve with the rest of the compote spooned on top.

Enjoy! C x